How to Relocate Indexed Files

There are two ways to get data into DEVONthink, importing and indexing. Importing copies files into your databases. Indexing allows you to keep your files in their locations in the Finder but still be used in your databases. Moving indexed files can cause them to appear as missing in the database. Here’s how to successfully handle such a move.
While it’s best to index data that won’t be moved around a lot, sometimes such a move is required. For example, you may purchase a new, bigger external hard drive and want to migrate your indexed data there.
After the move is done in the Finder…
- Select the indexed item in DEVONthink.
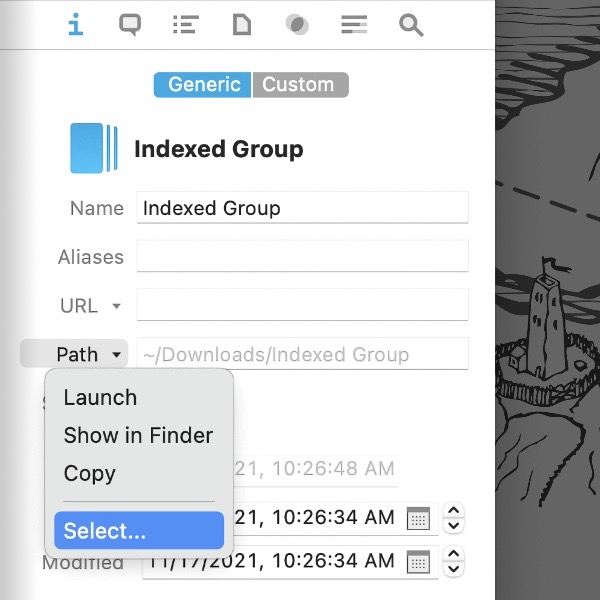
- Open the Tools > Inspectors > Info: Generic inspector.
- Next to the Path field, click the dropdown triangle and choose Select….
- In the Open dialog, navigate to the new location of the indexed item, select it, and press Choose. Files in an indexed Finder folder should have their path resolved to the new location.
Again, it’s is still a better idea to use indexing with a fairly static location whenever possible. But for those times it may be unavoidable, this should help reconnect things for your database.
PS: Indexing is not the default behavior for a reason and it should not be used without forethought. Please read the Help > Documentation > In & Out > Importing & Indexing section, especially the Indexing and the filesystem subsection, so you understand the interaction between DEVONthink and the indexed items in the Finder.
Note: This article deals with an older app generation. Interface elements, menu paths, and procedures could differ.
